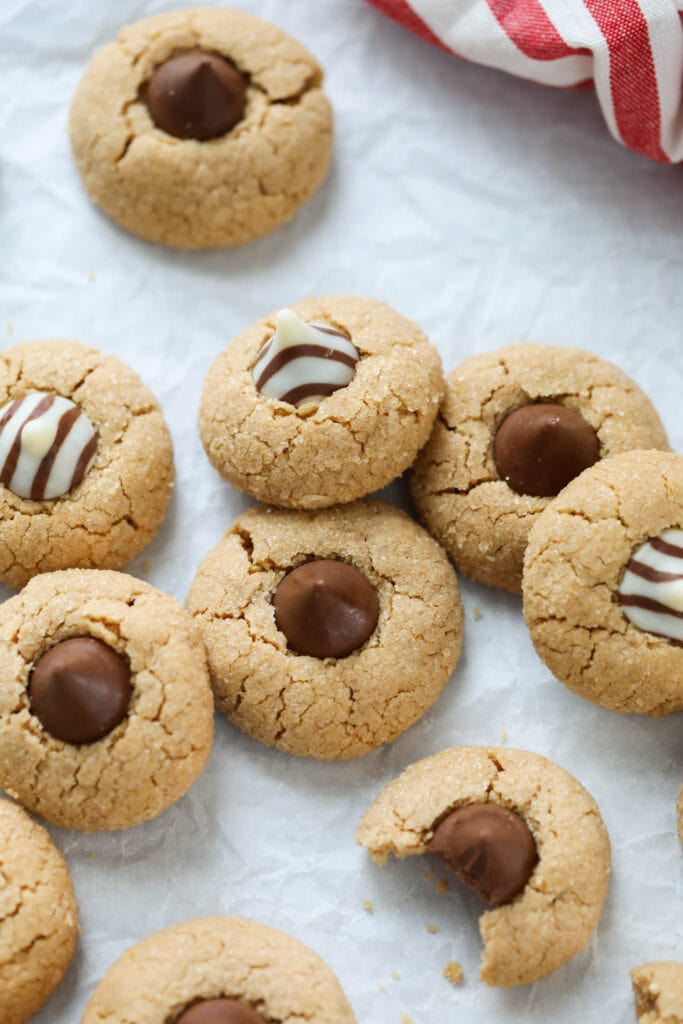
This classic Christmas cookie is always a favorite, and now you can make them Gluten Free Peanut Butter Blossoms with one simple ingredient swap. Whether you need a gluten free version or not, you can use this peanut butter blossoms recipe as your go-to for tender and delicious cookies. We love to serve these always-favorite cookies for holiday entertaining, a cookie exchange recipe, and as an always-appreciated food gift for teachers and friends.
Gluten Free Peanut Butter Blossoms Recipe Highlights
This classic cookie recipe has been a favorite in households for generations, and there are many reasons why, including:
- a delicious everyone-loves-it flavor combo of peanut butter and chocolate
- cute and uniform cookies made from an easy roll method
- simple ingredients, minimal prep time, and a total time of about 30 minutes
- easy to make gluten-free, if needed, with our favorite gluten-free flour blend
- can make them dairy-free, egg-free, and/or nut-free with simple swaps
Peanut Butter Blossoms Like Grandma Used To Make
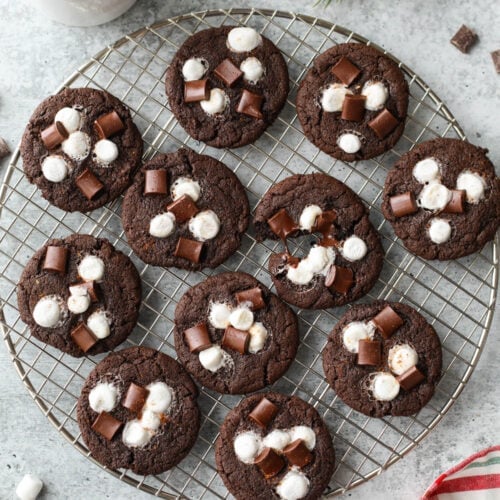
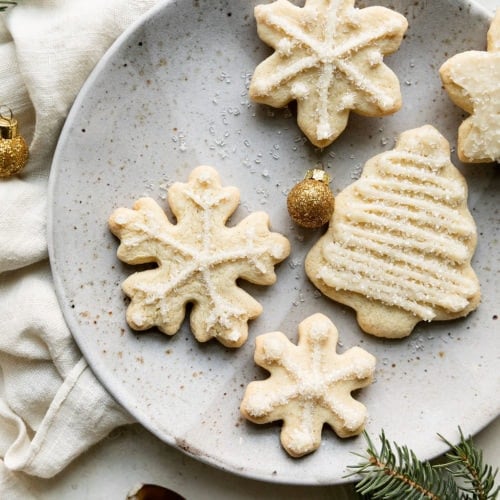
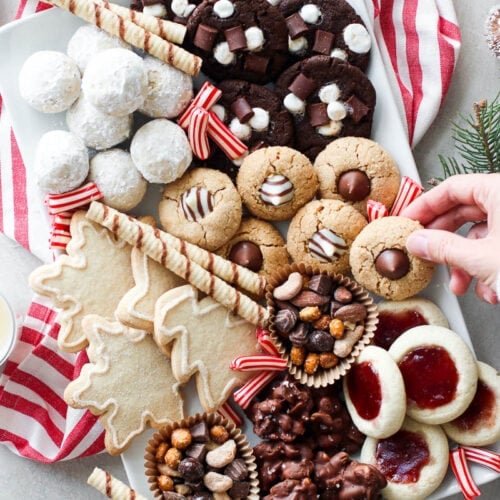
Along with these other gluten free Christmas cookies and treats, these Gluten Free Peanut Butter Blossoms are some of the favorite holiday cookies of our childhoods, and we’re guessing the same might be true for you, too!
We remember our Grandmas making them and we remember reaching for them on a cookie tray. They’re fun to make and they’re fun to eat! Do you eat all the way around the chocolate kiss center and wait for that last perfect bite? Or, do you bite right into the chewy center of the cookie to get some of the PB-chocolate flavor in each bite?
No matter how you eat them, we know a Peanut Butter Blossom Cookie (whether you make them as Gluten-Free Peanut Butter Blossom cookies or not) is a great way to enjoy the holidays.
What Are the Ingredients In Gluten Free Peanut Butter Blossom Cookies?
Gather these ingredients to make some of these quick cookies right away:
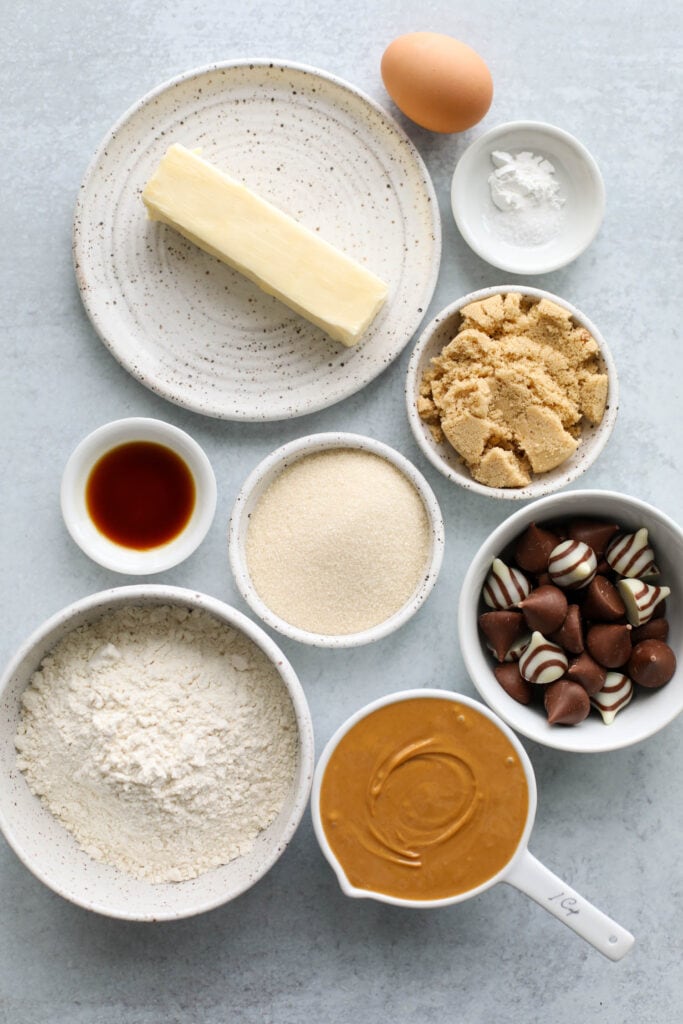
- Unsalted butter – we recommended unsalted butter, but if you only have salted butter on hand, that will work, too. See below for our suggested swap for the butter if you need dairy-free cookies
- Granulated sugar
- Brown sugar – we use light brown sugar, but dark brown sugar will also work
- Creamy peanut butter – use natural peanut butter at room temperature
- Egg – if you need cookies that are egg-free, see our swap below
- Pure vanilla extract
- Flour – you may use unbleached all-purpose flour or use a gluten-free flour blend to make gluten free Peanut Butter Blossoms. For gluten-free flours that are celiac-friendly, we recommend Bob’s Red Mill One-to-One Gluten-Free Baking Flour or King Arthur Measure-for-Measure Gluten-Free Flour. We don’t recommend almond flour or coconut flour as they won’t yield the same taste or texture
- Baking soda – not to be confused with baking powder
- Salt
- Milk – see the recipe card below for how we use milk in the recipe (it may not be needed, depending on how runny your peanut butter is)
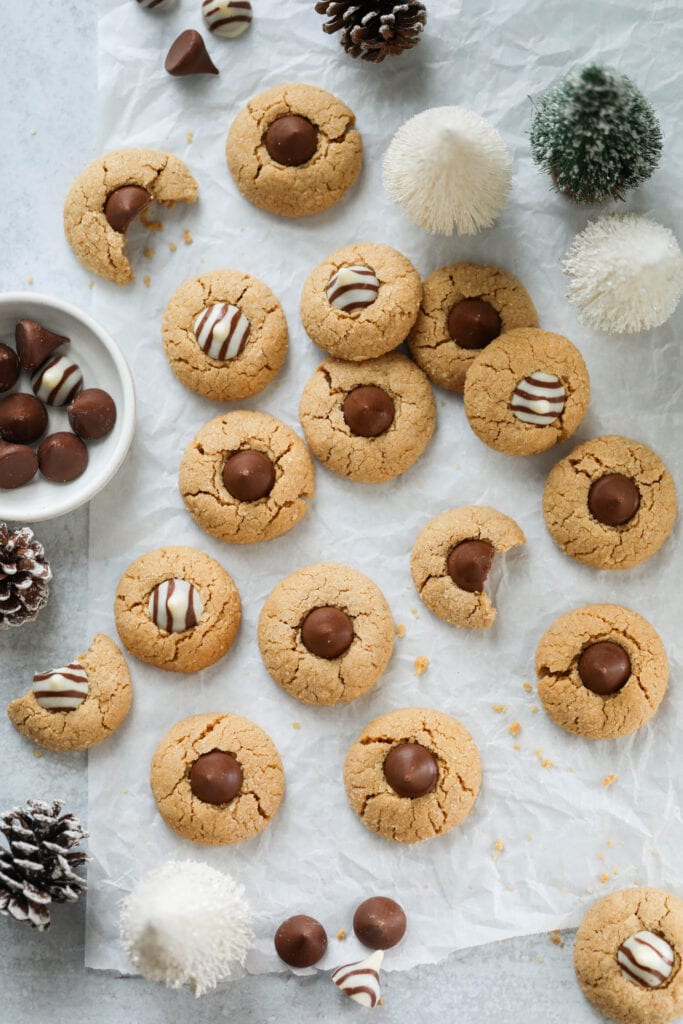
- Chocolate candy kisses – uses regular milk chocolate Hershey’s kisses, striped kisses, or any favorite flavor; or substitute with a chocolate star, chocolate heart, or other favorite chocolate candy or shape
For the complete directions and ingredient amounts, scroll down to the recipe card below. All of our recipes include the nutrition information, listing kcals, protein, carbohydrates, cholesterol, fiber, sugar, sodium, total fat, and more per serving.

How To Make Gluten Free Peanut Butter Blossoms
Here are the quick steps to make homemade peanut butter blossoms today:
- Preheat the oven and prep the baking sheets: Preheat oven to 350℉. Line two large-rimmed baking sheets with parchment paper or silicone baking mats.
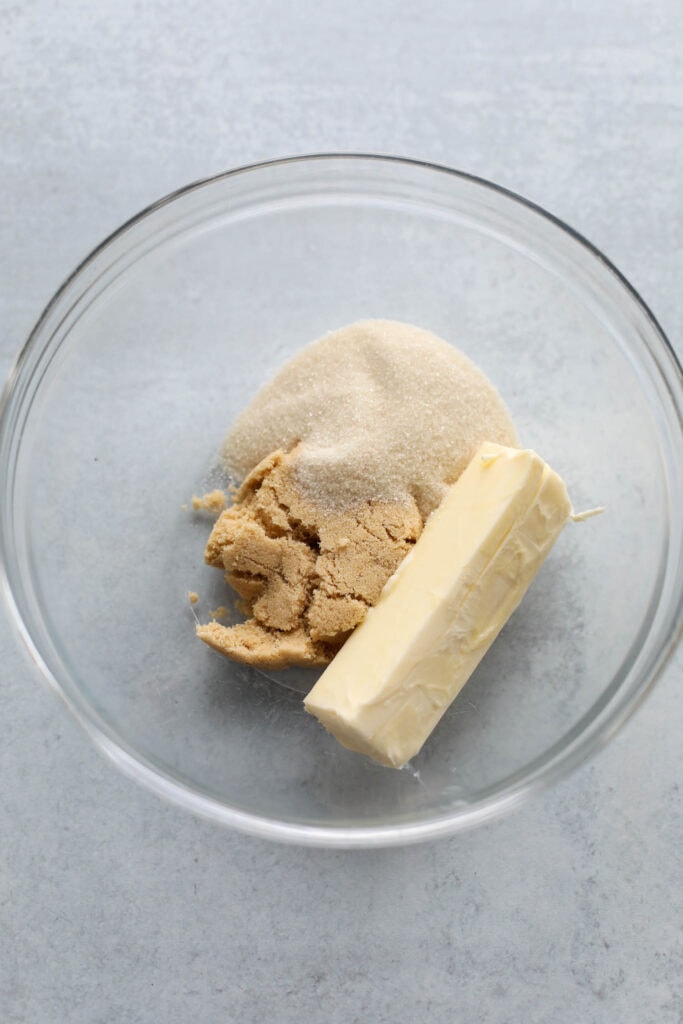
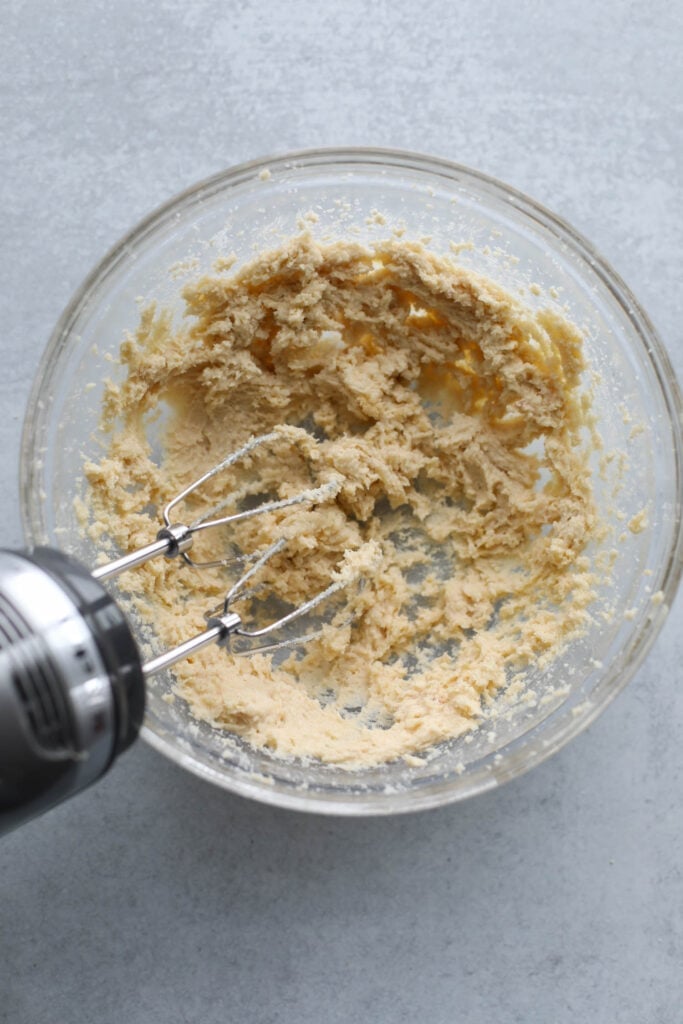
- Combine the wet ingredients: In the bowl of a sturdy stand mixer (or in a large bowl if using a hand mixer) cream together the butter, sugar, and brown sugar. Add the peanut butter, egg, and vanilla to the mixing bowl. Mix again on high until light and fluffy.
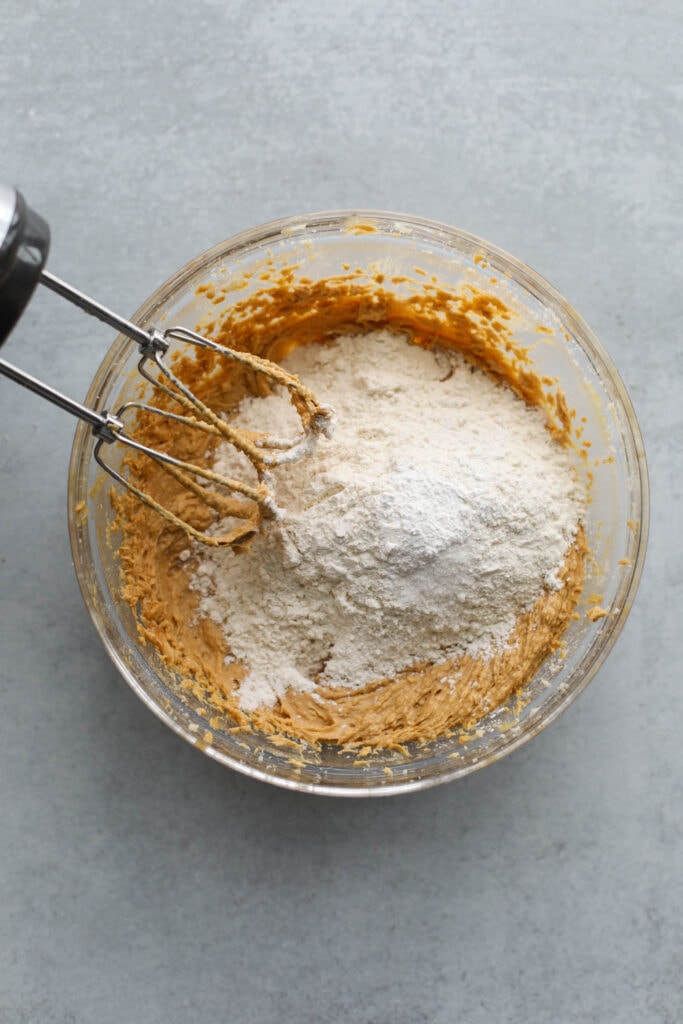
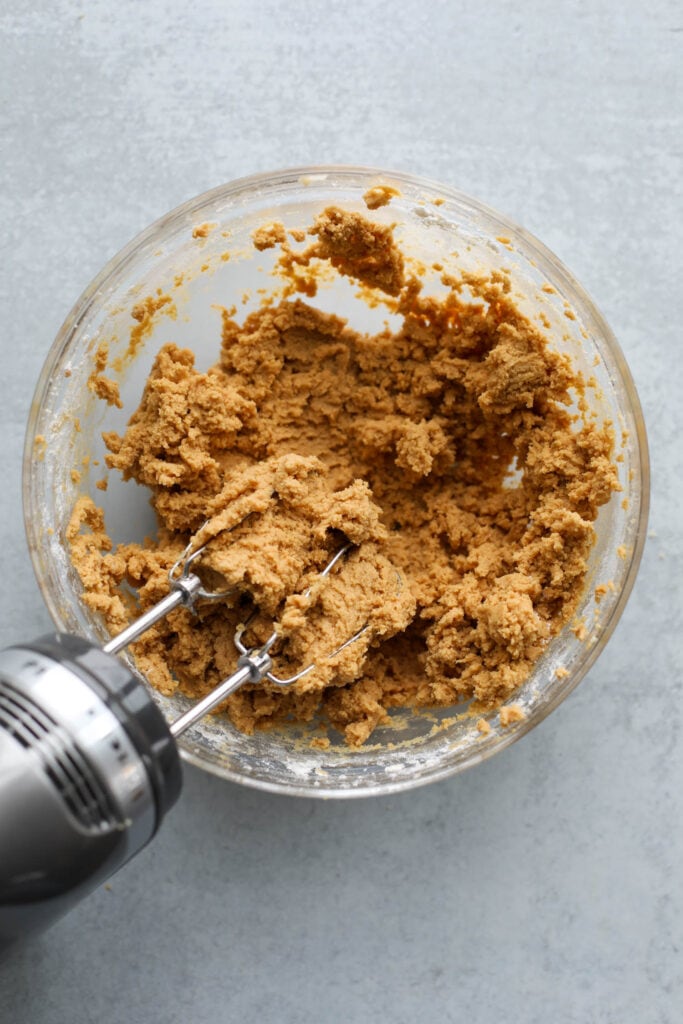
- Add the dry ingredients: Add the flour, baking soda, and salt, and mix on medium speed until a dough forms.
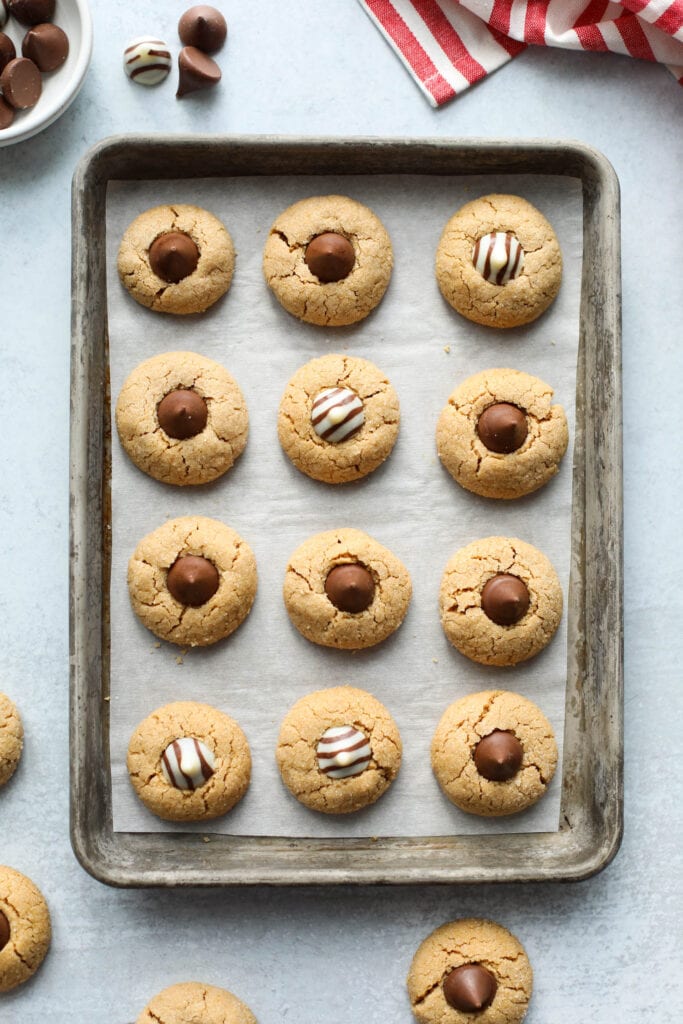
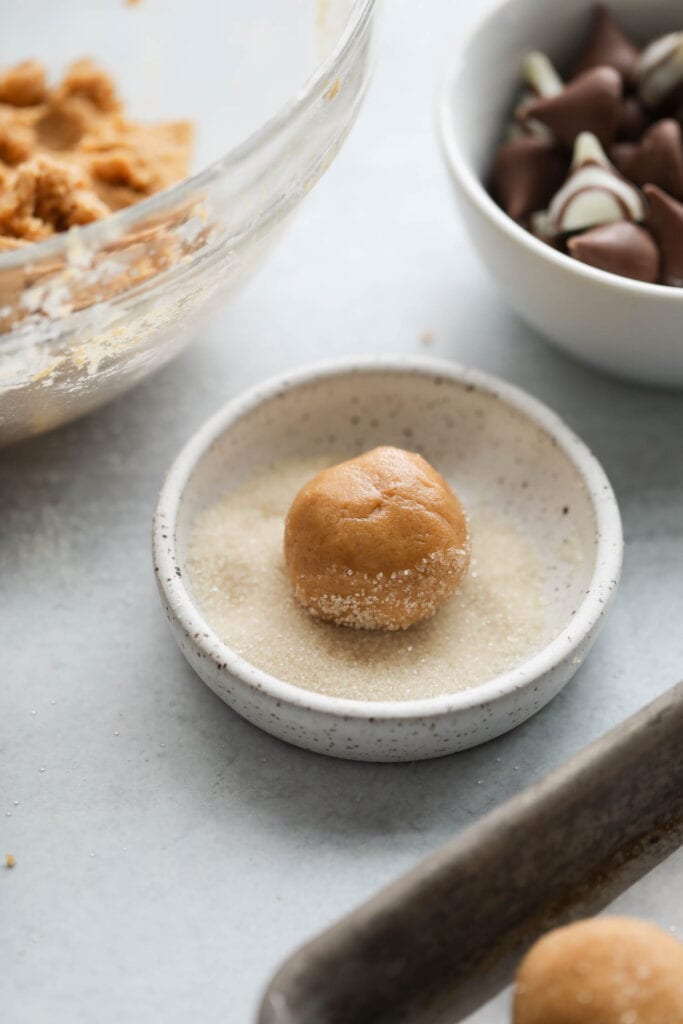
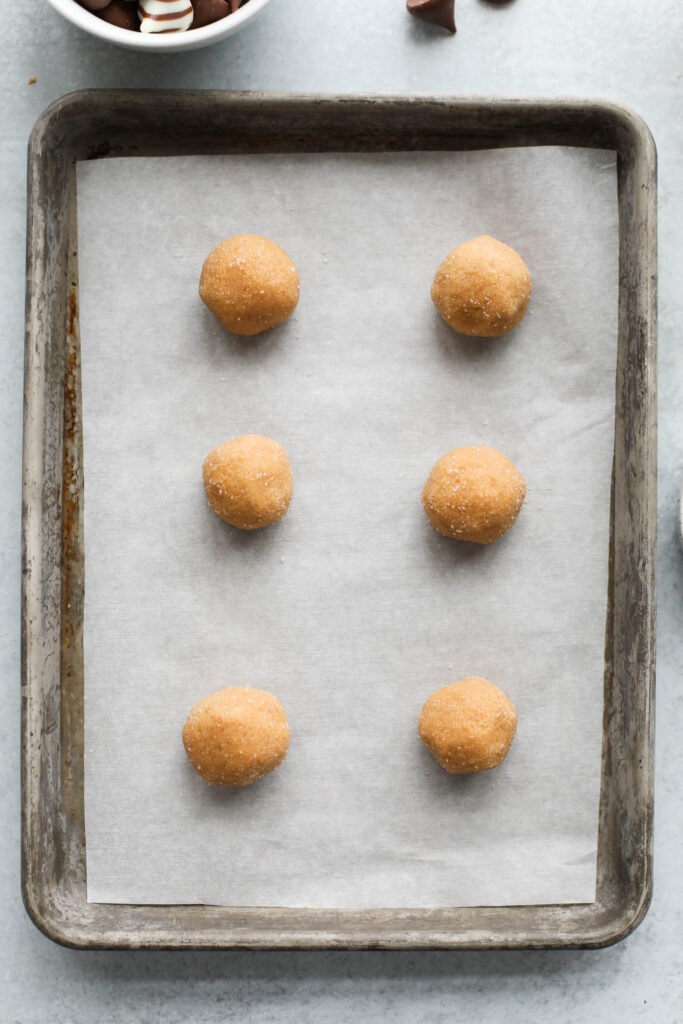
- Roll the dough into balls and bake: Use your hands, a measuring cup, or a cookie scoop to portion the cookie dough, and roll the dough balls into 24 to 30 pieces. If desired, roll each ball in sugar. Divide the balls among the baking sheets. Bake one baking sheet at a time on the middle rack of the oven for 9-12 minutes or until puffed and lightly golden brown on the bottoms.
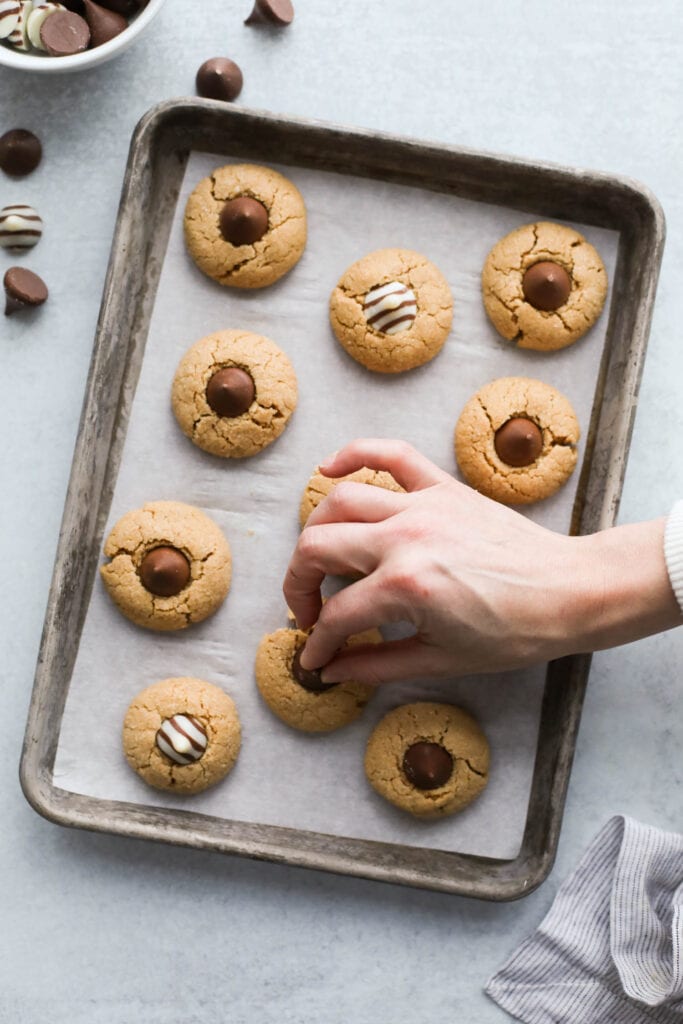
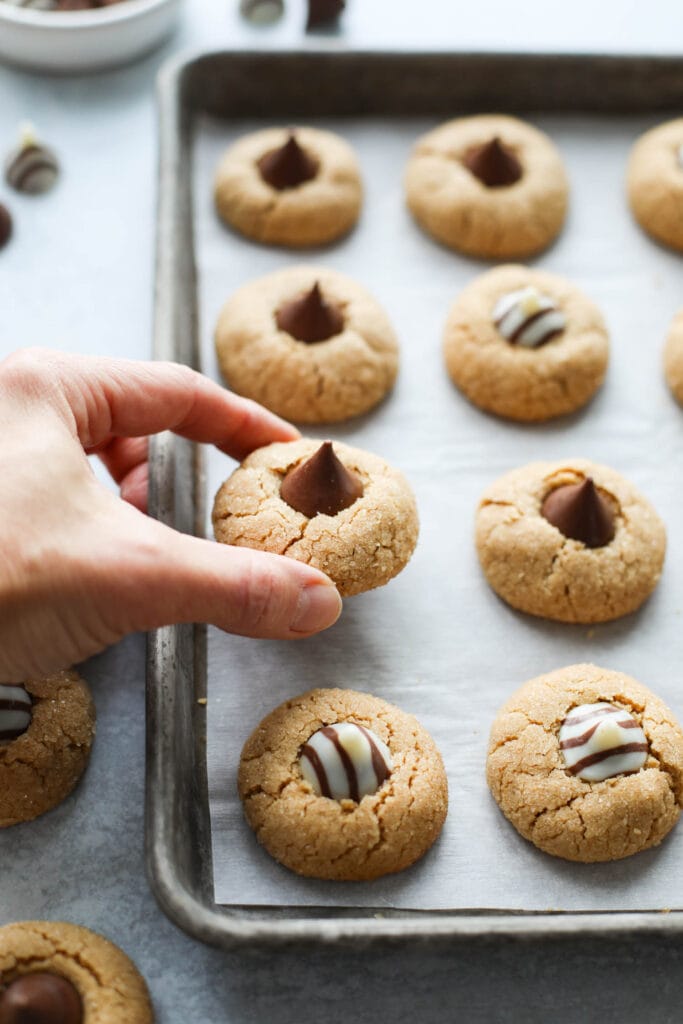
- Add the chocolate: Remove the pan from the oven, wait 30 to 60 seconds, and then quickly press one chocolate piece into the center of each cookie.
- Cool the cookies: Allow the cookies to cool on the cookie sheet for a few minutes before transferring them to a wire rack to cool completely.
For the complete directions and ingredient amounts, scroll down to the recipe card below. All of our recipes include the nutrition information, listing calories (kcals), protein, carbohydrates, cholesterol, fiber, sugar, sodium, total fat, and more per serving.

How To Make Dairy-Free Peanut Butter Blossoms
Easily make these peanut butter blossoms dairy-free with these simple swaps.
- Replace the stick of butter with a plant-based stick of butter such as Earth Balance
- Use a non-dairy milk of choice in place of the dairy milk; or omit the milk
- Use dairy-free chocolate candy pieces such as Hu Dark Chocolate Gems
Make These Cookies Without An Egg
Looking for an egg-free Gluten Free Peanut Butter Blossom recipe? One simple swap and it can be done. Here’s how:
- Omit the egg, and use a flax egg instead. To make a flax egg, combine 1 tablespoon of flax meal and 3 tablespoons of water. Let the mixture stand for 5 minutes to thicken, then add it to the recipe just as you would a normal egg
- The King Arthur Baking blog is one of our favorite resources for more egg-free baking tips
For Nut-Free Peanut Butter Blossom Cookies
They may be classic peanut butter blossoms, but if you need this cookie recipe to be nut-free, try this swap:
- Use sunflower seed butter or tahini in place of the peanut butter
- Or, if you can tolerate nuts other than peanuts, replace the peanut butter with creamy almond butter or cashew butter
Want to save this recipe?
Enter your email below & we’ll send it straight to your inbox. Plus you’ll get great new recipes from us every week!

Gluten-Free Peanut Butter Blossoms
Here’s a classic Peanut Butter Blossoms cookie recipe that has been loved through the ages. We also share how to easily make them gluten-free, dairy-free, nut-free, and/or egg-free, if needed.
Ingredients
- 1/2 cup (1 stick) unsalted butter, softened
- 1/3 cup granulated sugar + more for rolling
- 1/3 cup brown sugar
- 1 cup creamy peanut butter
- 1 egg*
- 1 teaspoon pure vanilla extract
- 1¼ cups flour**
- 1/2 teaspoon baking soda
- 1/4 teaspoon salt
- 1–2 tablespoons milk***
- 24 chocolate candy kisses or other shapes
Instructions
- Preheat oven to 350℉. Line two large rimmed baking sheets with parchment paper or silicone baking mats.
- Using a stand mixer or hand mixer, cream together the butter, sugar, and brown sugars.

- Add peanut butter, egg, and vanilla to the mixer bowl. Mix again on high until light and fluffy. Use a rubber spatula to scrape down the side of the bowl.
- Add flour, baking soda, and salt to the bowl and mix on medium until a dough forms. Check the consistency of the dough by rolling a small amount into a ball with your hands. If it’s dry and crumbly, add a little milk (see note below). The dough should be soft and pliable but not too sticky.
- Roll the dough into 24 to 30 ping-pong size balls. If desired, roll each ball in sugar. Divide the balls among each baking sheet. Bake, one pan at a time, on the middle rack of the oven for 9-12 minutes or until the cookies are puffed and lightly golden brown on the bottoms. Repeat with the second baking sheet of cookies. While the cookies are baking, unwrap the chocolates.
- Remove baking sheet from oven and immediately (within 30 to 60 seconds) press one chocolate kiss into the center of each cookie. Let the cookies cool on the pan for 5 minutes before transferring them to a wire rack to cool completely. The texture of the cookies will become soft and chewy as they cool.
- Store cookies in a tightly covered container at room temperature for up to 1 week or freeze for longer storage.


Last Step! Please leave a review and rating letting us know how you liked this recipe! This helps our business thrive so we can continue providing free recipes and high-quality content for you.
Notes
*For an egg-free version, omit the egg and use a flax egg instead. To make a flax egg, mix together 1 tablespoon flax meal and 3 tablespoons water. Let the mixture stand for 5 minutes to thicken, then add it to the recipe just as you would a normal egg
**You may use unbleached all-purpose flour or gluten-free flour, depending on what you need. For gluten-free flours, we recommend Bob’s Red Mill One-to-One Gluten-Free Baking Flour or King Arthur Measure-for-Measure Gluten-Free Flour.
***How much milk, if any, you use will depend on how runny or “wet” your peanut butter is. If the dough feels dry and crumbly after mixing (i.e. your peanut butter was on the drier side) then add milk, 1 tablespoon at a time, until the dough is soft and pliable but doesn’t stick to your hands when you roll it into balls.
Nutrition Information
- Serving Size: 1 cookie
- Calories: 165
- Fat: 11 g
- (Sat Fat: 4 g)
- Sodium: 43 mg
- Carbohydrate: 17 g
- (Fiber: 1 g
- Sugar: 9 g)
- Protein: 3 g
- Cholesterol: 14 mg
Dietary
Frequently Asked Questions
Store cookies in an airtight container at room temperature for up to 1 week, or freeze for longer storage.
Yes! These peanut butter blossom cookies are freezer-friendly. Let them cool completely. Then, place them in a freezer container/bag, and freeze for up to 3 months.
You’ll often find these cookies on Christmas cookie trays next to chocolate chip cookies and thumbprint cookies. And many families make them for the holidays. However, they wouldn’t HAVE to only be served around the holidays. You could enjoy them any time you have a craving for peanut butter and chocolate.
If you add the kisses to the cookies before baking, they will melt into a pool. To help keep the integrity of the shape of the chocolate kisses, it is best to add them after the cookies come out of the oven.
Yes, to make this recipe paleo, you would need to use dairy-free butter, coconut sugar, maple syrup, and dairy-free kisses.
For ultimate success, we highly recommend reading the tips in the full blog post above. All photos and content are copyright protected. Please do not use our photos without prior written permission. If you wish to republish a recipe, please rewrite the recipe in your own unique words. Link back to the source recipe here on The Real Food Dietitians. Thank you!

I’ve made these multiple times and they always turn out great! Around Halloween we like to swap out the kisses for peanut butter cups, add some candy eyeballs and chocolate legs to turn them into spiders.
I LOVE that! I might have to make these for my daughters 2nd Birthday Party this weekend!
So good! Thanks for the gluten and egg free version!
You are so welcome! Thanks for leaving a review!
Hi, I’m wondering if the milk can be Almond milk or if that’ll affect the flavor? /is the milk absolutely necessary?
Hi Sheila, how much milk you need (if any) will depend on how runny or “wet” your peanut butter is. If the dough feels dry and crumbly after mixing (i.e. your peanut butter was on the drier side) then add milk (and yes, almond milk is fine) using 1 tablespoon at a time, until the dough is soft and pliable but doesn’t stick to your hands when you roll it into balls.
Great cookie!
Just making sure on ingredients….never made PB Blossoms with so much peanut butter. I can understand 1 c PB if there was less butter. Thanks for your reply. I printed several recipes and trying them Sunday.
Recipe is 1/2 cup (1 stick) unsalted butter and 1 cup creamy peanut butter. Enjoy your day baking Sunday!
Super easy to make! My 4-year-old niece loved helping me with these cookies, and my husband has asked for them twice now during this holiday season. Our cookies came out nice and soft, a good balance between peanut butter and chocolate.
This makes us so happy to hear!